New Okedo Head

20140405_083249I finished the okedo head five days ago, applied it three days ago, and put it to the test yesterday.

The skin is calf and when I stitched it over the ring, I didn’t put that much tension on it because I wasn’t confident that the skin would hold up. I just pulled all the slack out of the skin and was done with it. Besides, I’d get more tension out of the head when I put it on the body and tensioned one head against the other.

Kathy, the lady that originally made the head, used goat skins. The goat skins have make a wonderful warm “bau” sound, but they’re really delicate and don’t put up with very much pummeling at all. They might’ve even been treated some how because they were really white and really soft. The calf skin I used has a high “pang” sound.

20140406_135431

After just a few-hour session of practice last Sunday, I examined the new head to see how it was holding up. (I was playing katsugi style, not mounted on a stand.) Some of the stitch holes had already begun to tear. We’ll see how long this one lasts. But the next head I do, I’m bumping up to cow skin.

20140413_100309

Okedo heads, why you have eleven holes?

One of my taiko ladies, Kathy, made a couple of okedo daiko several years ago. One of them needs both heads replaced. I planned on making one head and I’ll use one of the old heads as a resonation head and replace it later … eventually … I dunno when, just not today. I gathered my materials accordingly.

Since I’d be using one of the old okedo heads, I had to match the number of holes on the new one. The old one, to my dismay, had eleven holes. How … odd. I looked through some pictures of professionally-made okedo. Many had twelve holes, but many also indeed had eleven.

okedou_eitetu
Asano Taiko’s Okedo Taiko Eitetsu

Most of the shime heads I’ve seen have ten or twelve holes. So why eleven for an okedo?

Baby taiko

I bought a small barrel for myself last year to make a taiko out of. I’ve slowly been working on her. I finally got to staining a few days ago.

I put two coats of Minwax PolyShades (Stain & Polyurethane in 1 Step) Bombay Mahogany Gloss 480, which is like a middle chocolate, and an additional two coats of Polycrylic.

After my first coat of polycrylic, I sanded the surface with an ultra fine paper and then did the second coat, per instructions. The second coat did not seal up all of the fine scratches that the sandpaper put into the finish. I know the polycrylic is frivolous, but I wanted to see how glassy I could get the finish.

Well, after all of that, it’s not all that glassy. Shiny, yes, but it doesn’t look like the doh is encased in a glass shell.

So, I want to do another layer of stain and then seal everything up with three coats of poly. Hopefully, by sandwiching a layer of stain between poly, I can get the pigment to “float” and give it a stained glass appearance.

My biggest concern at this point is that the stain will dwell in the imperfections in the top coat (dust, bubbles, scratches). Fret not, I’ll do a test strip.

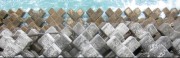
I have to wait a day before I can do anything else, so here’s what she’ll look like for the next 24 hours:

Image

You can see the reflection of my neighborhood in her finish.

Need    moar    shine   !